Step 5: Deploying the Agent
In this step, you will publish the SokoAI agent and embed it into the SokoAI marketplace website using a web widget.
Open the Publish Panel
-
Navigate to the top of your Agent Builder page and click the highlighted Publish icon in the top navigation bar.
-
This takes you to the deployment options page. Select Create web widget.
Configure the Web Widget
A configuration page opens. Complete the following settings:
-
Widget name — Enter
soko-deploy. -
Deployment version — Click the existing deployment version shown, or click Create a new version if none exists.
-
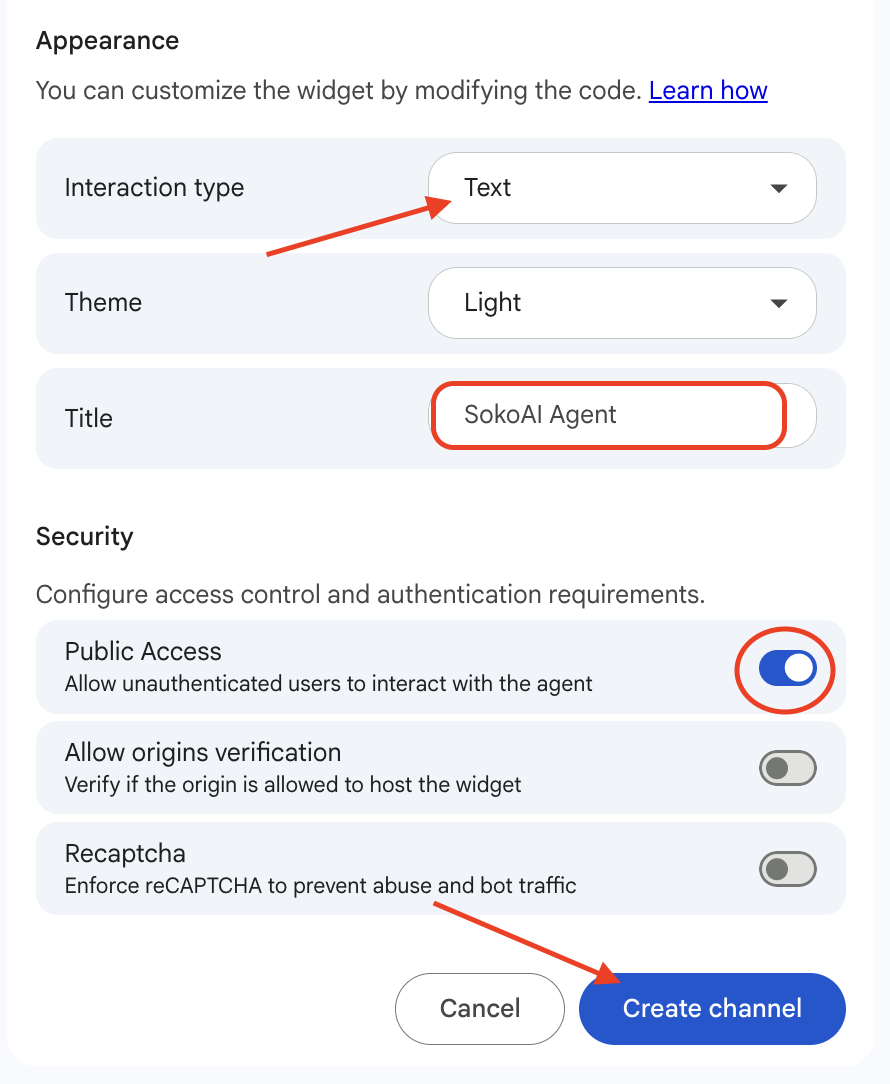
Input method — Switch the agent's input method to enable Text input.
-
Agent title — Enter the title that will appear on the chat widget when it is live on the website:
-
Public access — Enable public access to allow unauthenticated users.
-
Click Create Channel to complete web widget creation.
Copy the Deployment ID
-
After the channel is created, deployment instructions will be displayed.
-
Using the copy icon, copy the Deployment ID.
Tip
You will use this Deployment ID as an environment variable when redeploying the website.
Redeploy the Website
- Go to your Repository settings.
- Select Secrets and variables → Actions.
-
Update the secret
FRONTEND_NEXT_PUBLIC_CHAT_DEPLOYMENTwith the Deployment ID you copied. -
Trigger a redeployment of the website.
-
Once deployed, the SokoAI Agent chat widget will appear in the bottom right corner of the website.
Step 5 Complete
The SokoAI agent is now live and embedded in the website. Proceed to testing to verify the full conversation flow.